Flower preservation can be expensive, especially when you want to order a LOT of keepsakes at one time. I received a call a few weeks ago from a nice lady who wanted several keepsakes for her family after a loved one passed. We were brainstorming the most economical options for 15+ keepsakes when I eventually asked, "Are you crafty?" and she said "Yes, I'm very crafty!"
I excitedly explained how easy these bookmarks were to make and walked her through the process. After our call ended I decided I would write this blog for anyone else who may be in a similar situation like she was. Don't worry if you're not "crafty" - it is such a simple and inexpensive keepsake to make, you got this.
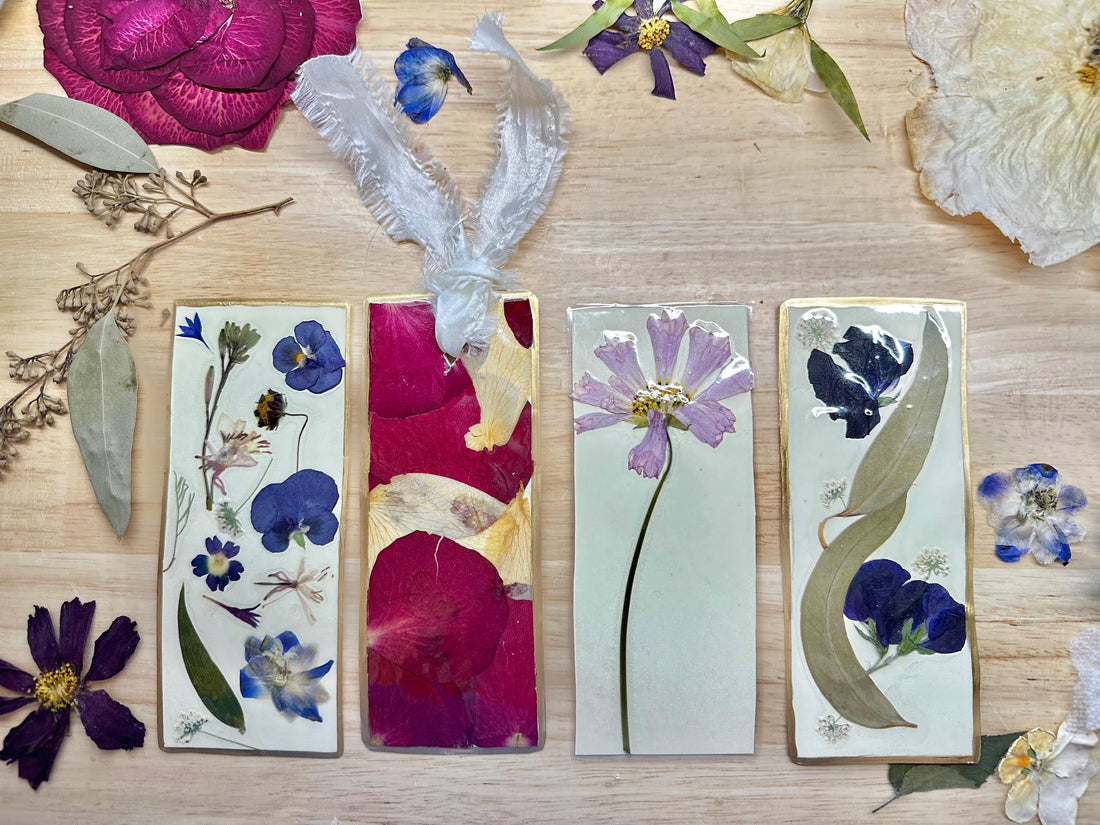
While these bookmarks do make great keepsakes for sentimental flowers, they also make awesome gifts for ANY nature lover, using ANY flowers. You can pair your bookmark with one of my favorite books, Braiding Sweetgrass, and BAM - perfect birthday gift. You can also couple the bookmark with a flower-related sympathy book or a really high quality candle like Moonstruck by Orchid+Ash for a really nice sympathy gift.
Anyway, opportunities are endless here. Please let me know if you made these and how they turned out. Tag @rootsfloralpreservation on instagram with your photos!
Let's get started!
Materials Needed

To create your own floral bookmark keepsake, you will need a few simple materials. You can easily find these at your local craft store or online at the affiliate links provided. These include:
- Pressed flowers, (blog post for simple flower drying methods coming soon)
- Scissors
- Tweezers
- Elmers glue or matte PPA glue
- toothpicks
- weights (optional)
- Laminator + pouches
- Cardstock
- Gold paint pen
- Ribbon (optional)
- Hole punch (optional)
How do you make a pressed flower bookmark?

The basic order is folding a piece of cardstock into 8 rectangles, cutting out the rectangles, arranging flowers on them, gluing them down and letting it dry, then laminating them. You have the option to add a gold rim and/or add a hole punch and a ribbon.
Step-by-step details are below.
- Start by folding a piece of cardstock in half

- Then fold the edges to the center of the fold.

- You should have a piece of paper that looks like this:

- Now fold this paper in half and cut along the folded lines to create 8 even rectangles

- Now the fun part! Arrange your pressed flower pieces on your cardstock rectangles.

- Take a photo of your design and slide all of your flowers off of the cardstock.

- Now you will glue your flowers to the cardstock using your photo as a guide. A toothpick is the perfect tool for applying glue to your flowers because it ensures you are only picking up a very small amount of glue at one time and that you dont have a lot of glue spilling out of the sides of your flowers. Remember, we are laminating over this so you just need them to stay in place for a short time. Small touches of glue are just fine.

- You may need to use weights, I used some light washers, to hold flowers against the paper.

- After all of your flowers are glued and weighed down, allow your keepsake to dry for a few hours before moving to the next step (lamination)

- Turn on your laminator to give it time to warm up. Wait until the laminator says "Ready" before feeding the laminator pouch into the machine. Place your rectangles inside of a lamination pouch - they can be near each other but not touching. You can pass it through twice if you want a bit of an extra seal.


- Use scissors to cut around the bookmarks. You want to be sure not to cut too close to the edge of the bookmark because you will cut the seal from the lamination. Scissors show the distance from the cardstock you want to cut in order to avoid lamination line and tweezers are pointing to the lamination line in the photos below.


- When cutting out the edges of the bookmark, you can round the edges so the keepsake is not too sharp.
Finishing Touches
At this point you have a finished bookmark keepsake! If you'd like to continue going, you can also add a couple VERY easy steps that would give them a clean and polished look.

- Gold paint pen around the edges of each rectangle. This covers your lamination line edge. If you mess this up or don't like the look after you do it, don't worry - you can easily remove it using a Q-tip and rubbing alcohol.

- And/Or punch a hole at the top of the bookmark and add a cute ribbon

Why is a floral bookmark keepsake a great idea?

Creating a floral bookmark keepsake is a simple and affordable way to preserve sentimental flowers from an event. It is also a great gift idea that can add a personal DIY touch to a simple book. I hope you enjoyed the tutorial! Please tag @rootsfloralpreservation if you have made these :) I would love to see your work!!